
To Block or Not to Block: Step-by-Step Tutorial in Blocking Your Handmade Pieces
by Michele Thymmons
Step by Step Blocking Your Handmade Items Tutorial
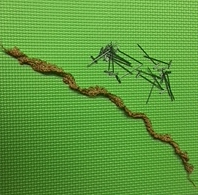
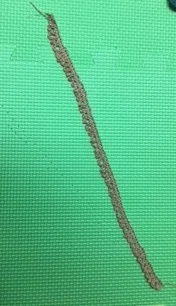
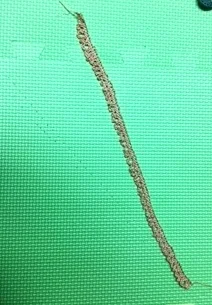
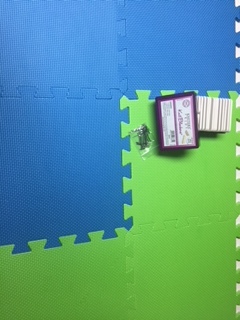
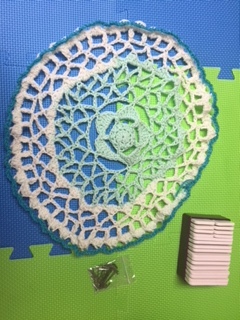
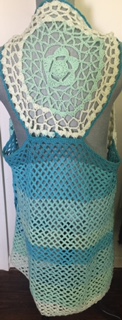
Having completed several successful and truly inspiring (and hopeful given the state of my crochet pieces) blocking events, I think I’m hooked! I will definitely start blocking more! Surprisingly, it is not as hard or time consuming as I thought. From start to finish it took me about one hour for several pieces and then another hour on another day for several other pieces. However, this also included pausing to take pictures and make sure I was able to document the whole process. Each step I took is documented below and pictures for the process blocking both a crochet necklace and a crochet vest are below. DesertBlossomCrafts blocking article was instrumental in walking me through the process. The below steps are how I went from the picture on the left of a twisted crochet necklace to the picture on the right, a necklace ready for wearing. :)
Also, you’ll find a checklist at the very end of this article and a link for a PDF printable checklist version as well.
Preparation:
Step 1: Several decisions must be made before you dive into blocking a crochet/knitted piece. The time taken to truly detail what you are going to do will make the actual blocking go quickly. Decisions that must be made:
1 - What are you going to block? Is it jewelry, shawl, pieces of a garment, etc? This determines the answers to the next question.
2 - What is the type of yarn used in your piece? The type of yarn will help you decide what type of blocking you want to do. This class from Craftsy (www.craftsy.com/knitting/classes/blocking-handknits/35471) helps determine the type of blocking you want to do based on the yarn type you have (and much more! I am working my way through this now and love it! More to follow on this class and Bluprint in a future article). For example, my crochet necklace was cotton but I realized that given the size of it, I should start with the steaming and not soaking it (probably my least favorite one and one I haven’t used yet). Steam is recommended for most yarns and is what I used in both the necklace and vest.
3 - What size is your piece? This will determine what location you block your piece as well as how much space you’ll need to keep free while your piece is drying.
4 - Where will you block? It needs to be a location that is big enough for your piece to be laid flat, while also out of the way so that it can ideally stay in one place until it is dry. I used my counter space after we ate and determined it could remain until morning.
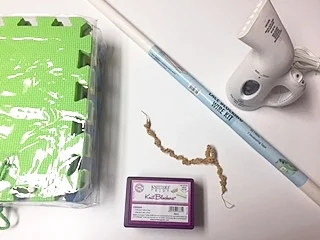
5 - What type of equipment will you use to block? Once you’ve decided on the type of blocking you’ll do, you’ll know the equipment you need. For me, since I used steam blocking I had the following equipment:
- travel steamer; any small steamer, or large if you are blocking something big, will work but you want it to be something you are comfortable handling)
- water for the steamer
- outlet or batteries for the steamer
- blocking pads or something similar
- pins
- knit blockers with pins
- crochet/knitted piece to be blocked
- counter space for the blocking
Note - This post contains affiliate links, which means I will make a commission at no extra cost to you, should you click through and make a purchase. But I never recommend something that I don’t use myself. :)
The blocking equipment I used and will continue to use is from Knitter's Pride and include the Pin Blocks with 20 Pins of 12 x 8 pins and 8 x 4 pins, 9 blocking mats in three colors, and the portable fabric steamer similar to this one. I have used these extensively and am actually using them now as I am creating a huge sports blanket that has several smaller squares that need to be blocked..and I LOVE it!!! Blocking and learning to block items has changed how my finished product looks and I am so thankful that I took the plunge to learn how to block. :)
Setting up:
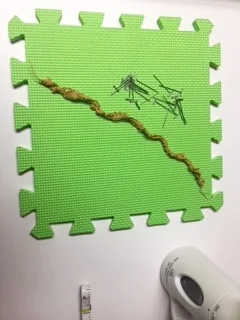
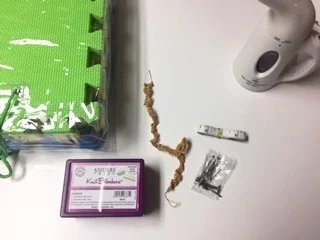
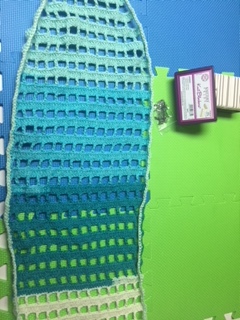
Step 2: Once I made the above decisions and gathered my equipment, I set everything up on the counter. My blocking pads I spread out over the counter and interlocked them to form one cohesive flat pad that I could lay out my crochet pieces on for blocking.
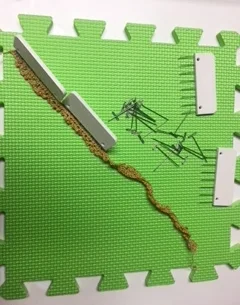
Once the blocking pads were set up, I laid out my crochet necklace (and the second time the vest pieces) and the pins I would use to block it. During this step, I make sure everything was in easy reach and the pins were placed in a way that I could quickly put them up and place them in the necklace when I started.
The steamer filled with water (to the line marked), sat on the counter near the plug which was right next to the counter space I used for blocking. I also double - checked that the steamer would reach once plugged in. Additional water was in a cup I could use to pour into the steamer should I need it.
Blocking:
Step 3: Compared to the above, this step probably took the least amount of time, which was ironic given that it was the piece I dreaded. Especially hearing that for steaming, I needed to be very careful to not get too close to my piece or I would risk burning it and causing the piece I worked hard on to be potentially ruined. However, I pushed that to the back of my mind, took a deep breath, and dove in. :)
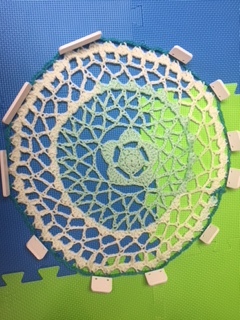
Once the above was set up, I plugged in the steamer and waited for a minute while it heated up. During the time I waited I carefully put the knitting blockers (with 4 and 8 pins) into the necklace, straightening it out while I went.
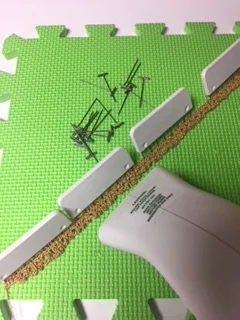
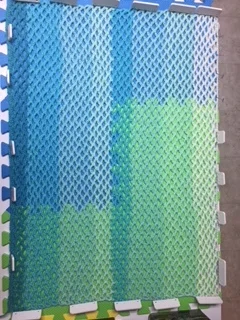
When the steam started coming out of the steamer, keeping a distance of about three inches, I ever so slowly steamed the necklace. Starting at one end, I held the steamer over the necklace and moved the steamer down the necklace to the other end. Being very careful to not get too close nor too far away. Water did condense on the blocking pad and on the necklace but I could literally see it straighten before my eyes!!! MAGIC!! :)
Putting my steamer down, I looked back over the necklace and used some of the individual T pins to space out the loops on the necklace to show more details of the piece. Then went back over the necklace one more time make sure I didn’t get too close.
Once that necklace was done, I repeated the above with several other necklaces and bracelets I had created but the magic was not any where as drastic as the first necklace. Ironically the other pieces did not really show much difference between before and after blocking. However, the first piece was tremendously changed because of the steam blocking!
After Blocking:
Step 4: YES!!! Blocking is off my bucket list now :) Seriously though, I had gone in one night from having no idea what blocking was to feeling like “hey, I can do this!!” Now I could successfully say I had been there done that with blocking. Not necessarily an old pro but it was a start! :)
Now, you just wait….and wait….and wait…until the piece is dry. Sometimes it is good to wait for a couple of hours, other times depending upon how wet the piece got, you may need to wait till morning for it to be completely dry.
And after you touch it and it is dry…try carefully pulling out one pin. If your piece does not change its shape but maintains the same look despite the pin coming out, your piece is ready for the pins to be removed!! Slowly and carefully pull them out, making sure that they do not snag on the piece you worked so hard on.
However, if your piece does not maintain its shape with one pin pulled out, you need to reassess the piece. Does it need to dry longer? Do you need to repeat the blocking step but perhaps go over the piece three or four times? Making sure it is wet/damp from the steam?
Once all of the pins are out, you can complete the finishing touches (add embellishments, sew pieces together, etc) and VOILA!!! You completed your first blocking of a piece you made!!! Celebrate and enjoy your new piece with all the details front and center so everyone can love it and see the hard work you put into it!!
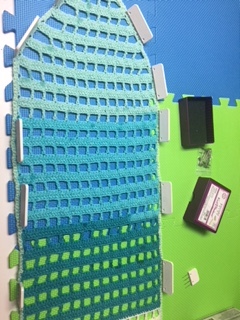
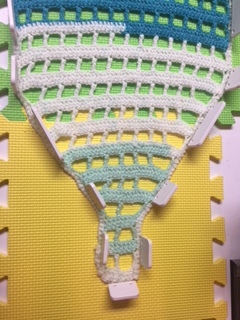
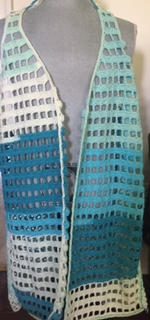
The two pieces I used the above steps on are the crochet necklace and a crochet vest (Avonlea Vest pattern by Brie at Fiber and Fern Boutique). You can also find our collaboration Maker Feature about Pattern Making here. For the vest, I blocked each piece (see below), which was significant counter space as the vest was much bigger than the necklace. Once they were blocked, I sewed them together to create my first garment :)
For additional information about wet blocking, I’m including a video link below by one of my favorite Crocheters and fiber artist Toni of TLYarnCrafts. You can find out more about her in her interview with us. :)
Thank you for reading this tutorial! Please let me know if there are any questions you have about any steps, the equipment from Craftsy I used, or the patterns for each of the two items. This is just the first tutorial of many!! I will be adding to this as I refine my techniques and try others. And I would love to hear if this helped you as well as your own recommendations for other ways to block. Just email me and I look forward to hearing from you!
PDF Version of the Checklist below can be found here. I even made the bullets into diamonds so you could check each one as you go through the list. :)
Checklist:
Prep:
- What are you blocking?
- What type of yarn makes up the piece?
- What type of blocking will do you?
- What size is your piece?
- Where will you block it?
- What equipment will you use?
Set up:
- Gather equipment and piece blocking
- Set up blocking pads
- Prep steamer and have additional water nearby
- Set up crochet/knitted piece and pins on blocking pad
Blocking:
- Steamer on
- Place pins in the item how you want it to lay
- Steam over the piece
- Look again to make sure details of the piece are the way you want
- Steam over the piece again if you made any adjustments
After Blocking:
- Wait till piece is dry
- Test if dry and ready to become “pin less” by removing one pin
- If maintains its shape, you can slowly remove all pins
- If it does not maintain its shape, reassess if needs more time to dry or if you need to repeat the blocking step
- Once pins are out, put finishing touches on item and enjoy!!


Have you seen the adorable dinosaurs that are from Cookie and Dinos? You can find out more about her in her awesome interview with us. She is walking you through how to create a cute dinosaur using a crochet hook, clay, needle, and wire. What a great way to combine fiber arts and clay sculpting!!! And to introduce each world to the other :). So gather your materials and let’s get started on creating your own adorable dinosaur :). I can’t wait to see what you make!!